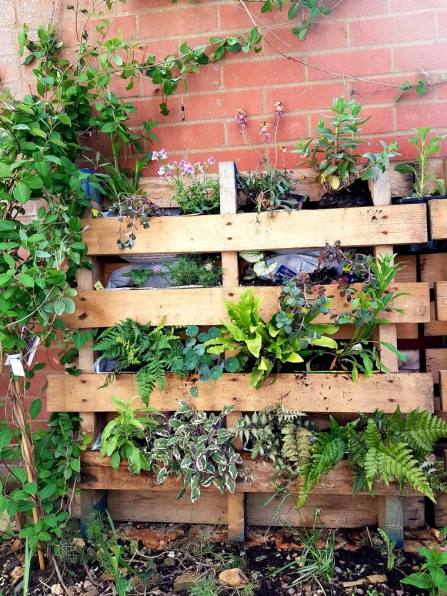
A pallet garden is a great way to add height and greenery to a bare wall or sturdy fence, allowing you to cram even more wildlife-friendly plants in! Here are step-by-step instructions and tips for how to make a pallet garden from recycled materials.
First find a pallet
They’re all slightly different. Turn them over and look at the underside (the side with fewer slats) - this is the side you will have facing you to plant into. I chose ones with just four slats as I wanted a bit more space between each slat for the plants. Also, if you’re having a few side by side, check the colours and fading of the wood match. I found one was very grey and one was a warm yellow, so searched though our pile until I had two similar in colour.
Cover the back
Turn them so that the underneath is facing you and slats are horizontal. Cover the other side (now the back) of the pallet with a strong weed-stop membrane. If you’re putting your pallet garden against a house wall you’ll also need to add a waterproof membrane over the back of the pallet to prevent damp. Advice on this is available online.
Once that’s done, I used a substantial DIY staple gun (not a craft one), to secure the backing. You might also want to cover the sides to create an enclosed space.
Make your planters
Now you need to make little pouches for the compost and plants to sit in. I was lucky - each half (left or right side) was just the right length to use the bottom of a supermarket bag for life.
Flatten the plastic bag, run a pair of scissors along about three or four inches up (leave it taller if you’re not sure, you can always cut down to size when you’ve tried it out) to cut the bottom’s pouch section off. This will then sit inside each section and you can use a staple gun to secure in place. I began with one staple in the middle at the back, then each end, then secured over the front lip of the slat at each end. It takes a little while.
If you don’t want to use plastic, weed netting or similar will be fine but you need something the water will drain through. Stab holes with a pair of scissors through the bottoms of all the plastic pouches. Fill each little pouch with compost but leave them shallow enough to top up with plants.
Choose your plants
Choose your plants to suit the size of your pallet and your gaps. You’re looking for two or three plants per slat space/area. Choose a range to suit you and put shade and water-loving plants towards the base.
I have three types of fern forwards the bottom, a few herbs in amongst, a few pretty little flowers, some sedums that grow tall, some that will trail, and some taller plants (erysimum, wallflowers) for the top to make it pretty.
You can check out our guide to choosing pollinator-friendly plants here.
Raise and fill your pallet
Raise the pallet, leaving a gap of two or three inches between the base of the pallet and the wall, and lean gently. Secure the top of the pallet to the wall firmly. I was lucky - there were already several screws in the wall at the perfect height. I used garden wire, wrapped around a top slat, round the screw, onto the next screw and back around the top slat of the next pallet to secure everything safely.
Fill all areas with compost and plant up your plants, not forgetting to water them in well.
Alternatively, you might decide to plant up your pallet while it’s still on the ground, and then lift and secure it when it’s finished – this will make it heavier to lift.
Stand back and admire your new garden!


